![]()
|
|
Scorpions driving past during the parade. |
In most Commonwealth armoured regiments affiliated or allied with the British Royal Tank Regiment, the celebration of Cambrai Day takes special significance in the regimental calendar. On 20th November 1917, near Cambrai in France, the fledgling Tank Corps was first used en mass, when some 400 armoured vehicles took part in an attack on the German lines.
On Saturday 19th November 1983, the Queen Alexandra’s Squadron (QA Sqn) of the Royal New Zealand Armoured Corps (RNZAC) held a mounted parade in honour of the occasion. The Squadron was located at Waiouru on the centre of the north island of New Zealand, in the shadow of the snow capped peak of Mount Ruapehu.
The parade was commanded by the Officer Commanding (OC), Major Graeme Ready, later to become the Director of the RNZAC. The QA Squadron traces its roots back to its horsed predecessors, and the OC rode a horse on parade, as did the Honorary Colonel and two of the officers.
After an inspection and drive past, the Squadron moved off the parade ground for a drive though the camp. A firepower demonstration was conducted later in the day by the School of Armour, using the Scorpion and M113A1 vehicles.
The following pictorial presentation of the parade and other events gives some details of the camouflage and markings of the RNZAC vehicles at that time.
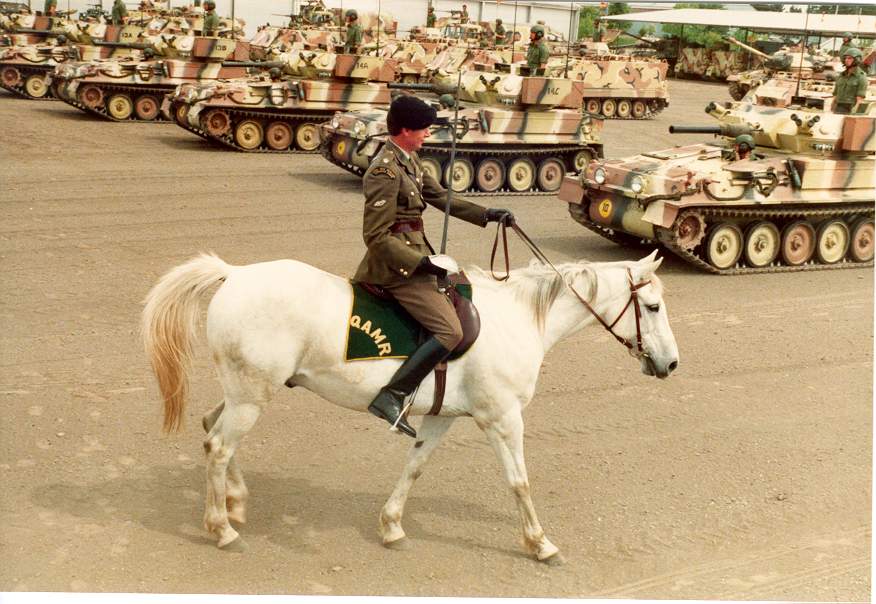 |
Major Graeme Ready inspecting the Squadron from his horse. |
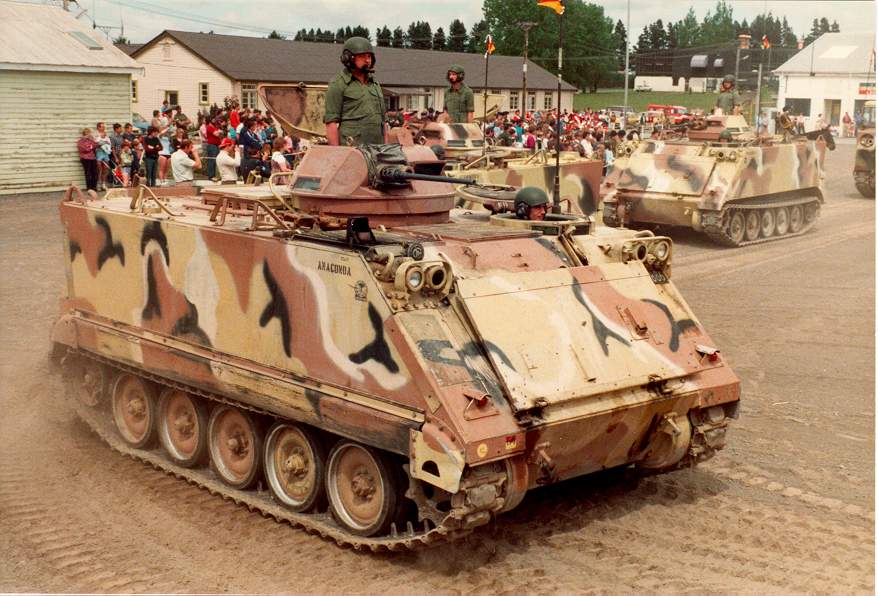 |
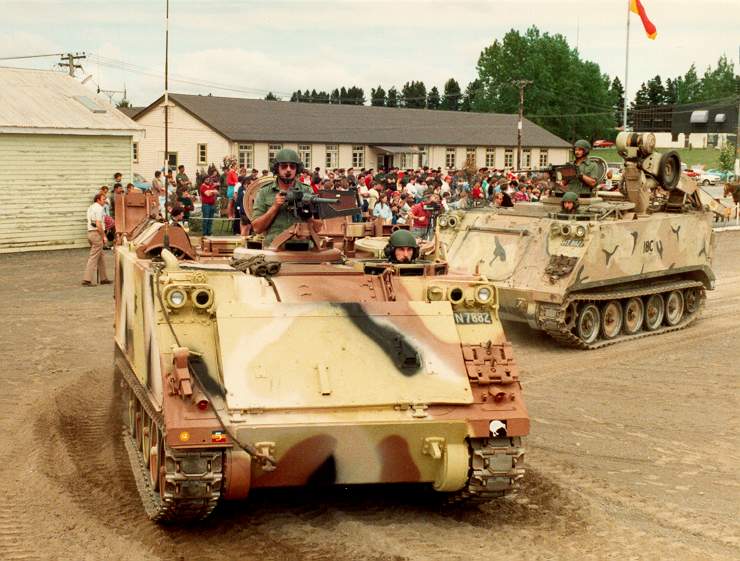
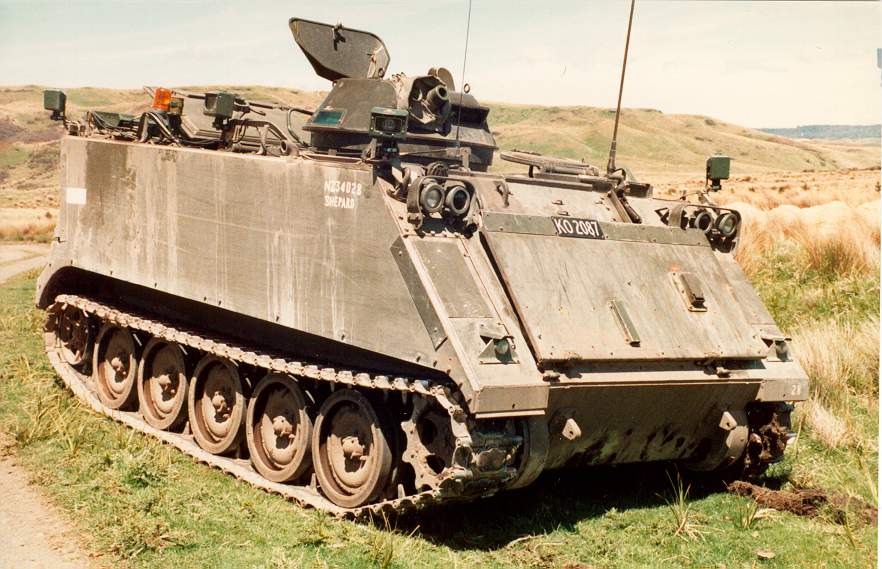
The M113A1 vehicles driving past the reviewing stand. The US style MERDEC camouflage was used, as it most closely matched the Waiouru training Area desert terrain. The bolt on aluminium panels on the hull front between the headlights and the turn indicators have luminous reverse sides which are used when the vehicles operate on a public road. Only a 0.50 inch machine gun is fitted in its T50 Turret. |
 |
The cut down rubber side skirts are clearly visible in this view of an M113A1 during its drive though the camp. |
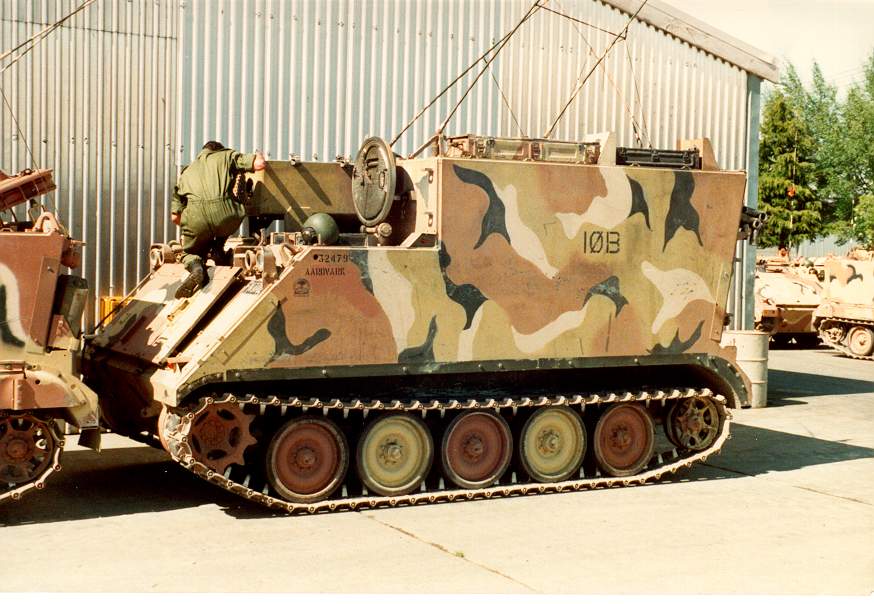 |
"Aardvark", an M577A1 Armoured Command Vehicle with callsign One Zero Bravo (10B) prior to the parade. The side skirts have been removed, leaving the original green paint finish along the lower hull. |
 |
An M125A1 Mortar Carrier from the front. The vehicle mounts an 0.50 inch machine gun on the commander’s cupola. |
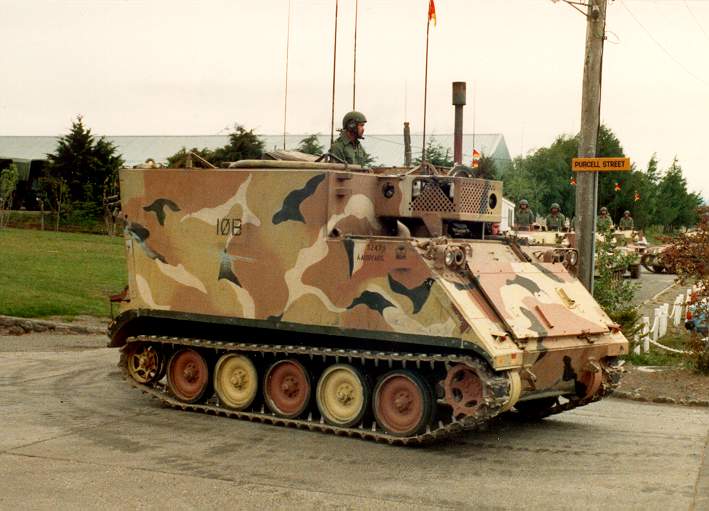 |
"Aardvark" from the right side during its drive though the camp. The four aerials on the roof can be seen, as can the stowage rack for the portable generating set on the front of the vehicle’s superstructure. |
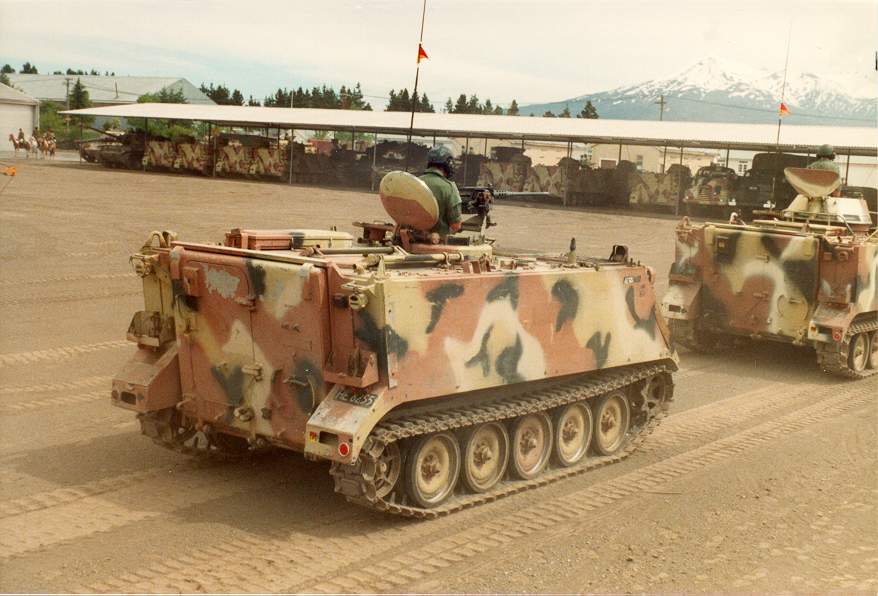 |
The side opening rear hatches of the Mortar version are seen in this photo of the M125A1. The civilian number plate carried on the rear mudguard is carried by all New Zealand Army vehicles which can operate on public roads. A five digit NZ number is also carried. |
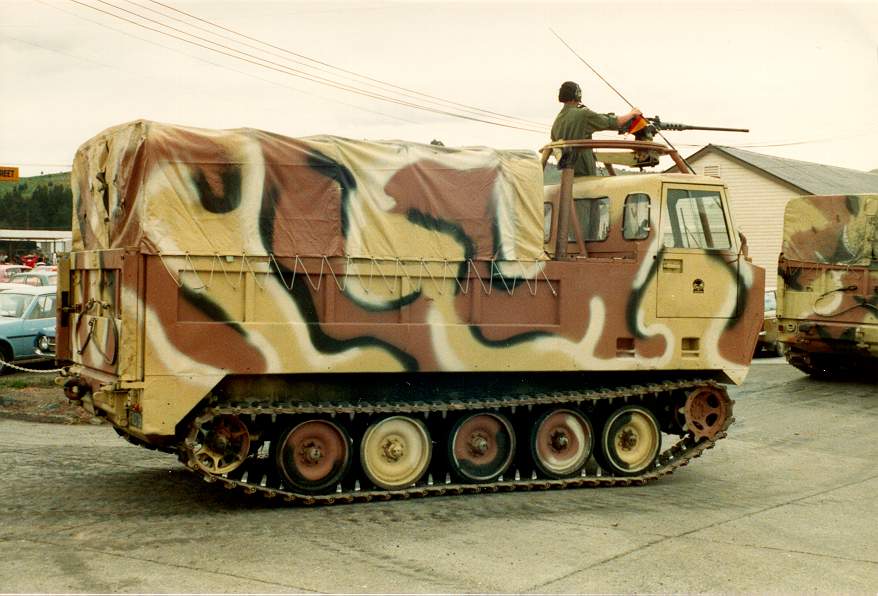 |
This M548A1 Tracked Load Carrier (TLC) has a hard top over its cabin area instead of the more normal canvas roof. The vehicle commander standing in the ring mount with 0.50 inch machine gun is holding the vehicle’s radio aerial to avoid collision with overhead power lines. |
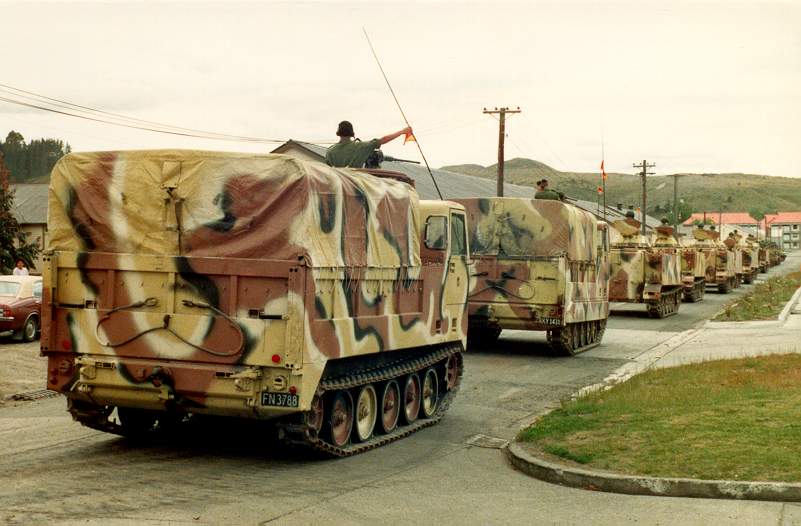 |
A rear view of two TLCs showing the difference in camouflage patterns. Even the plasticise canopies are camouflaged. |
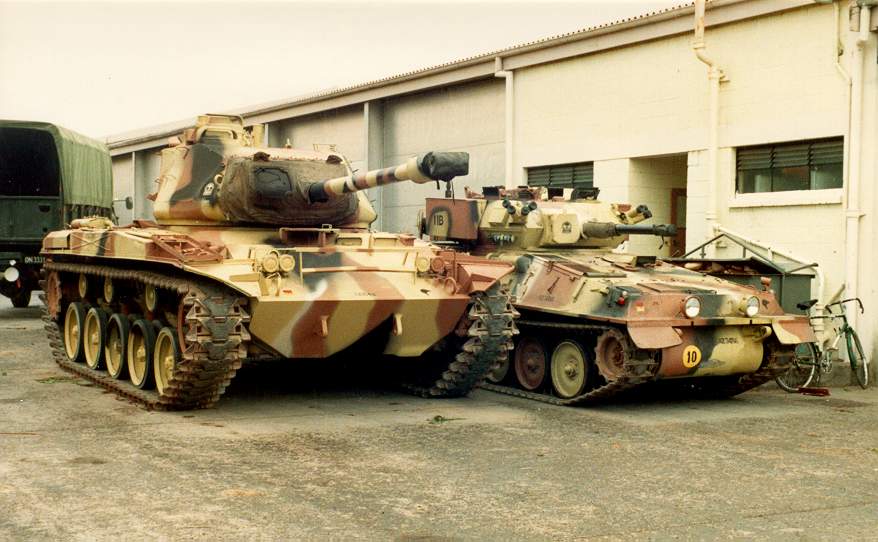 |
A lone M41A1 tank was paraded on the day. Here the vehicle is parked next to one of the Squadron’s 16 Scorpions, giving a good comparison of the relative size of each tank. |
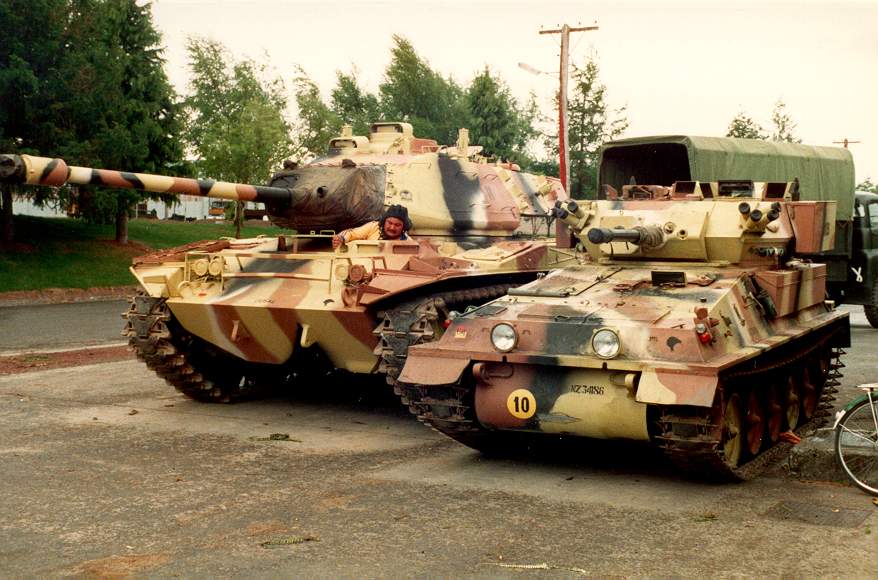 |
The driver of the M41A1 is wearing a Russian Style padded crewman’s helmet. The markings carried by both vehicles are seen in this photo. |
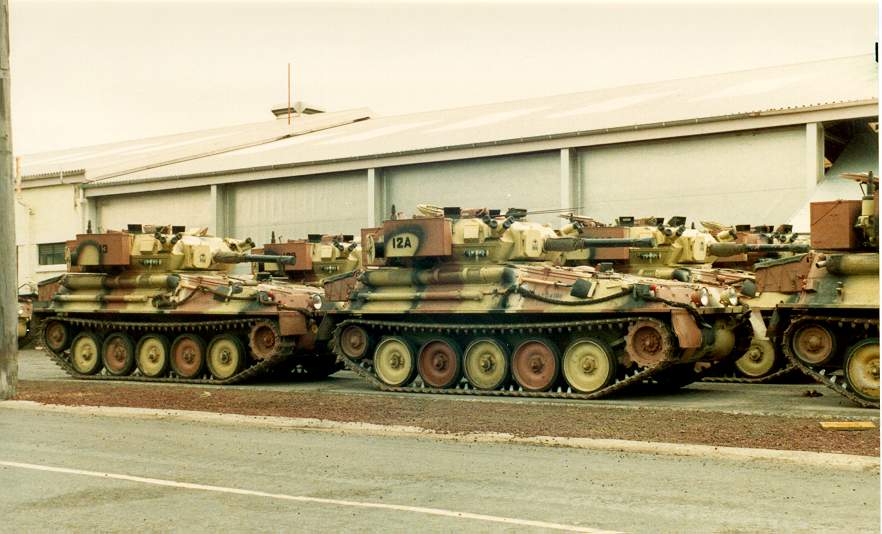 |
A line up of Scorpions prior to the parade. The radio callsigns are carried on the side of the turrets, and the camouflage patterns are quite similar. |
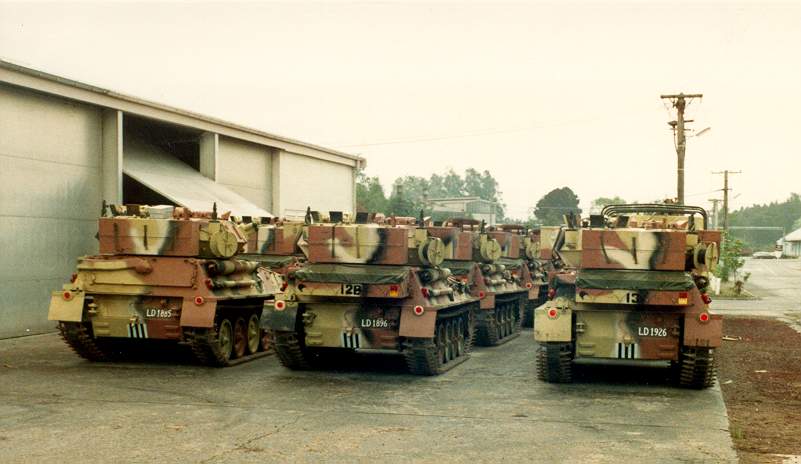 |
The same line up of vehicles from the rear. The vehicles carry the radio callsign on the hull rear stowage box, although the left hand vehicle is not so fitted. The civilian number plates on each vehicle are visible on the hull rear. |
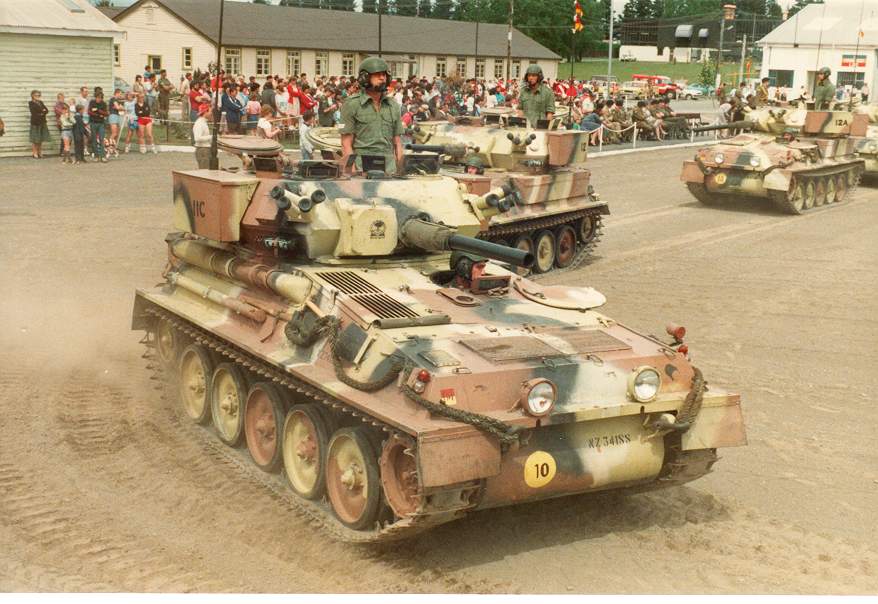 |
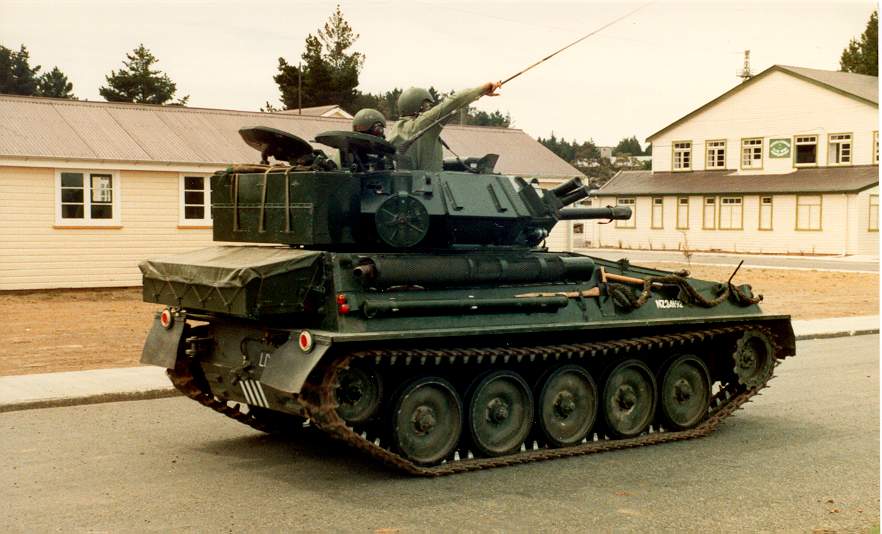
The Scorpions driving past during the parade. The Squadron badge is stencilled on the searchlight cover, and the 76mm barrel is in gunmetal finish. |
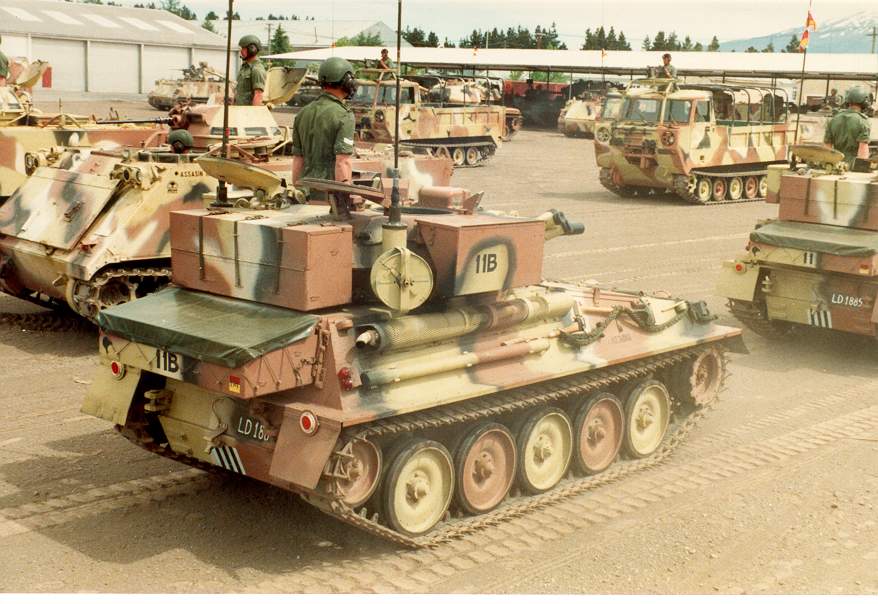 |
A close up of one of the Scorpions. The various stowage boxes of the New Zealand version are seen, and the convoy stripes in black and white are seen on the lower hull rear. |
 |
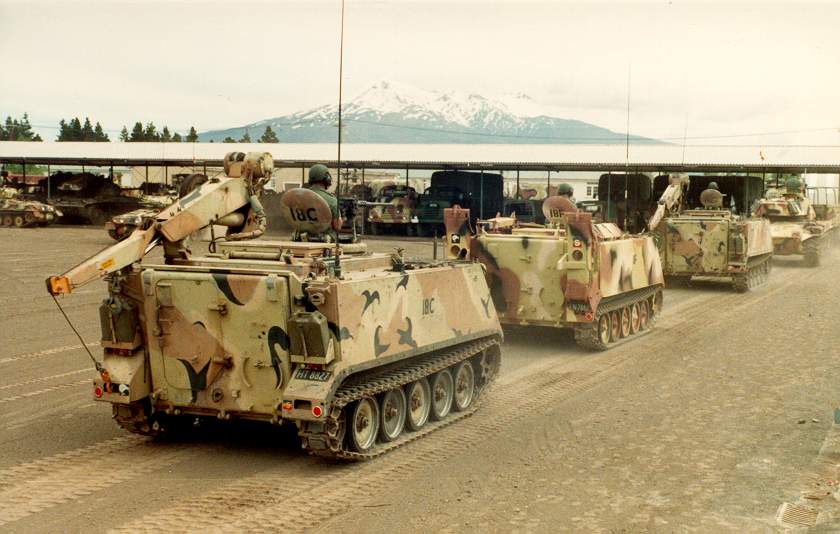
An M806A1 Armoured Recovery Vehicle Light (ARVL) and M579 Fitters vehicle driving past the reviewing stand. The QA Squadron used those designations for their vehicles, although neither were standardised for US service. The difference between the freshly painted ARVL and the well-used Fitters vehicle is very noticeable. |
 |
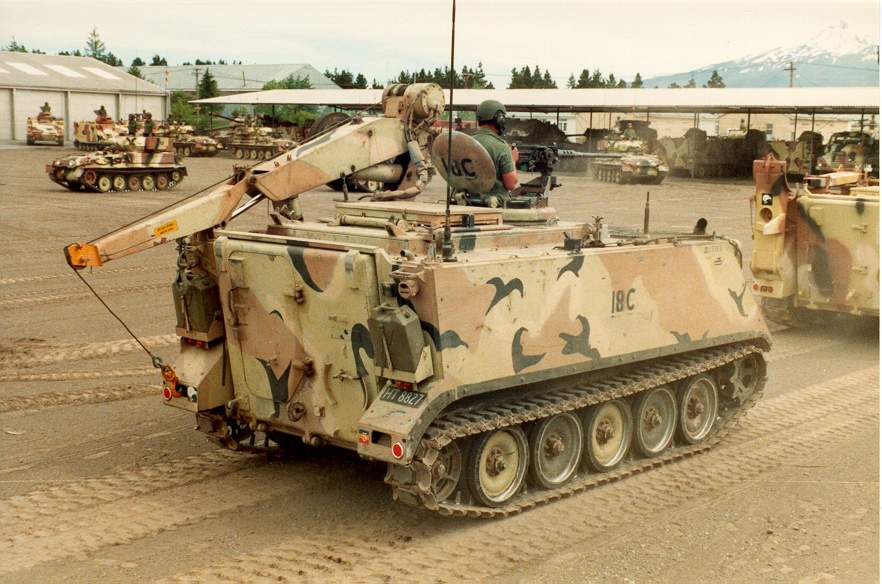
A rear view of the ARVL, showing the anchor spades for recovery operations, and the centre spade section stowed on the right hand side of the roof. The small hand operated crane is in its travelling position on the left hull top, and the vehicle callsign is painted on the commander’s cupola hatch. |
 |
Two Fitters vehicles and an ARVL from the rear. The Fitters crane is not stowed in the recommended travelling position, although this postion makes it easier to come into operation when at the site of the vehicle casualty |
 |
A detail view of the Fitters, showing the large centre roof hatch which opens to give access to the hull interior. A personnel cargo hatch is also fitted, and the Australian style filter box on top of this smaller hatch is clearly visible. |
 |
An M113A1 of the School of Armour at the firepower demonstration. It is finished in a dark olive drab colour scheme, the T50 turret being an even darker shade. The vehicle carries sensors for the Simfire system, which allows simulated combat to take place and "hits" to be recorded. The civilian number plate is carried on the trim vane and the NZ number is in white on the hull side. |
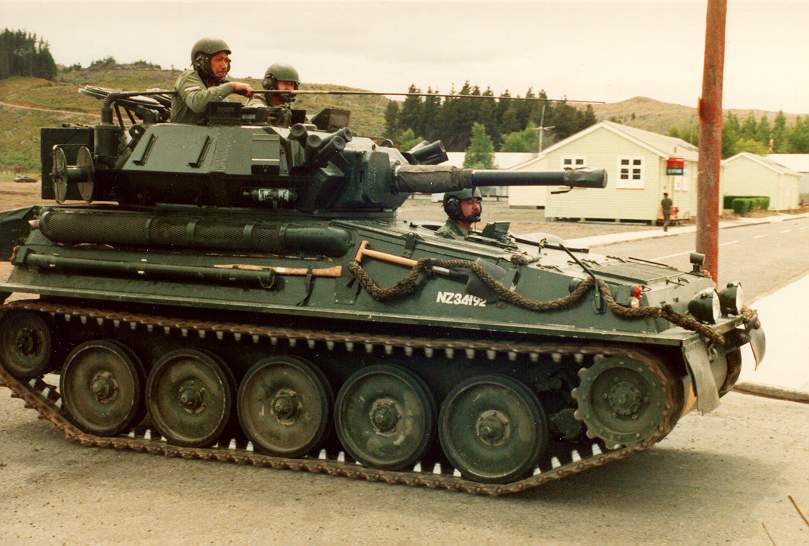 |
A Scorpion tank on its way to the firepower demonstration. This bronze green vehicle does not have the stowage box on the right side of the turret, and a nylon kinetic energy towrope is stowed on the front of the hull. |
 |
The rear of the same vehicle. |
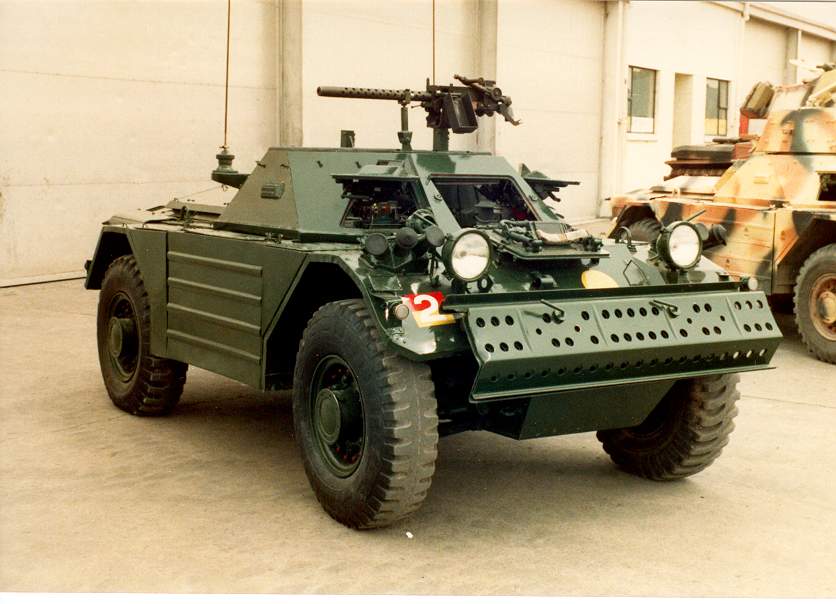 |
The Squadron displayed some of its former equipment, and we see here a Ferret Mark 1 Liaison Vehicle finished in bronze green colour and mounting an 0.30 inch Browning Machine Gun. |
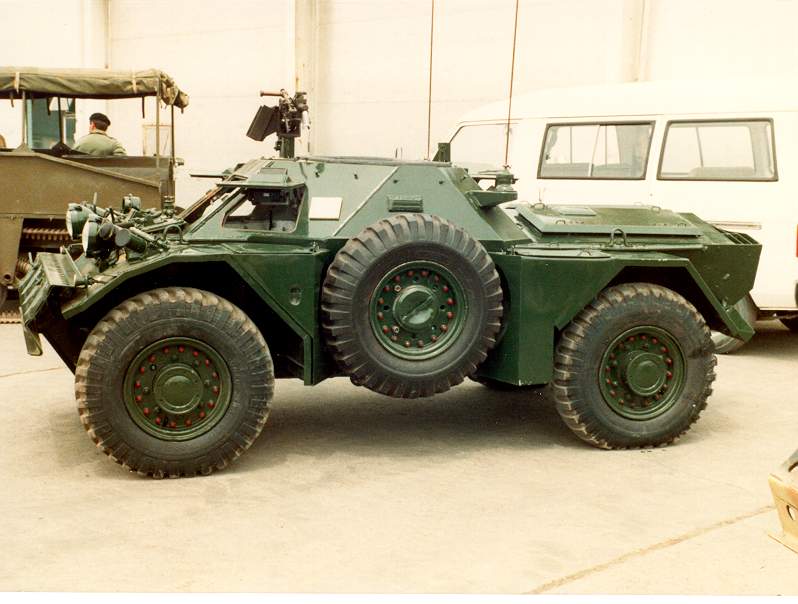 |
Another view of the Ferret Mark 1. |
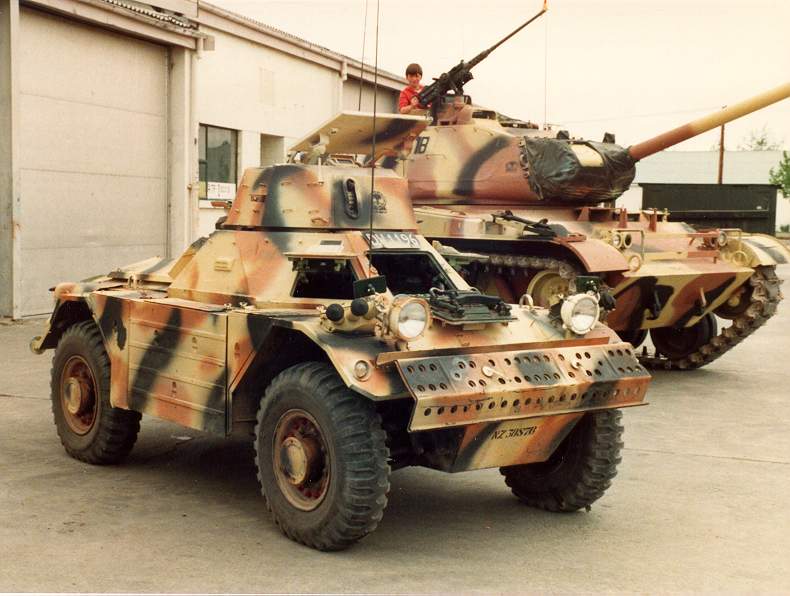 |
The Ferret Scout Car Mark 2 in camouflage, parked near an M41A1 Tank. The sand channels are stowed on the hull front, but the vehicle lacks any armament. |
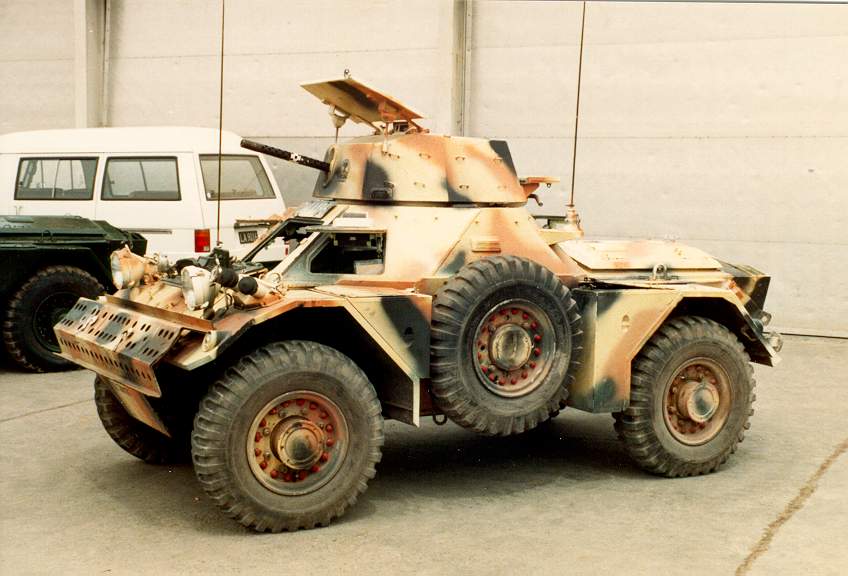 |
A side view of the Ferret Mark 2 Scout car. |
![]()
Article Text and Photographs Copyright © 2000 by Paul D.
Handel
Page Created 20 May, 2000
Last Updated 05 June, 2001
Back to Anzac Steel Main Page