![]()
|
|
|
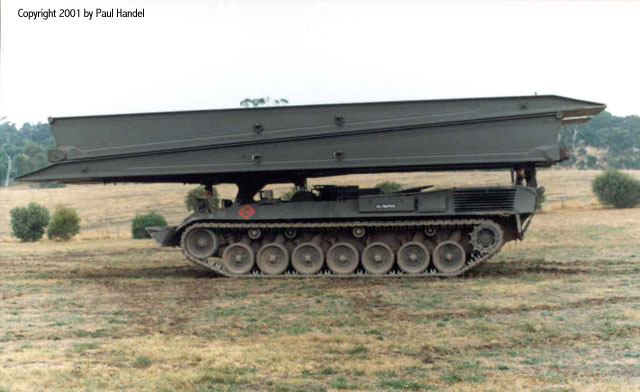
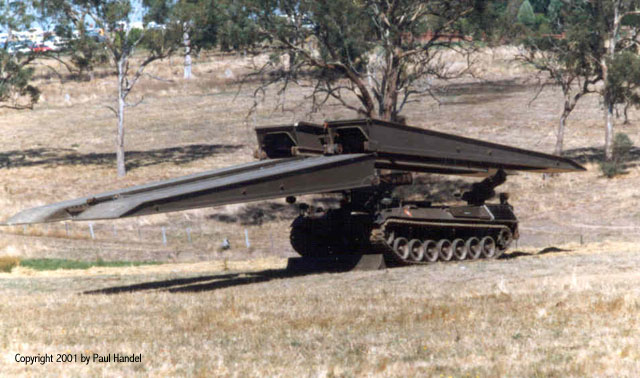
A left side view of a bridgelayer of 1st Armoured Regiment in travelling configuration, with the bridge halves resting on top of each other. The vehicle and bridge are in the original German green camouflage colour, with a Headquarters Squadron diamond symbol and callsign in red. (avlb01) |
![]()
This article looks at the two Leopard non - Main Battle Tank (MBT) variants which are currently in use with the Australian Army. These are the Armoured Vehicle Launched Bridge (AVLB) and the Armoured Recovery Vehicle Medium (ARVM).
![]()
Simply known as the bridgelayer in Australian Army service, the Leopard AVLB provides mobility and gap crossing ability integral to the armoured regiment. Along with the MBT, Australia purchased five (5) bridgelayers, which arrived in 1977. The bridgelayers, known as Biber (Beaver) in German service, were built by MaK Maschinenbau GmbH of Kiel.
The bridgelayer uses a modified Leopard AS1 hull and running gear. The hull rear differs from that of the MBT, in that it is not flat and contains some integral stowage boxes. The driver is located in the normal position on the right front of the hull, with the commander in a special cupola on the right centre of the hull.
The bridge support and launching mechanism comprises a launching arm, pivoted at the forward part of the hull roof, and raised and lowered by hydraulic rams. A support and guide mast at the rear of the hull top provide the means of controlling the bridge sections during the launching procedure.
The bridge, constructed of a high strength metal alloy, weighs 9800 kg, and is carried horizontally in two symmetrical halves. Unlike other bridgelayers before it, the Leopard Bridgelayer launches the bridge horizontally, maintaining approximately a maximum height of about four metres. By way of comparison, the Centurion Bridgelayer which the Leopard replaced carried a bridge of almost 16 metres in length which was launched in an "up and over" method, with the bridge at one point standing vertically, thus presenting a very large "signature" on the battlefield. The Leopard bridge is a flexible unit by virtue of its construction, and can compensate for different cant angles of the ground at either end of the bridge. The bridge can also be used if there is a difference in height between the launch end and the opposite side of the gap of some 5 metres down or 2.5 metres up. The bridge is 22 metres long and has a useable span of 20 metres. It has an MLC (Military Load Capacity) 50 rating.
To deploy the bridge, the vehicle halts before the gap and lowers its front mounted support blade. The lower section of the bridge is run forward using the rack and pinion drive system, then slightly raised in order to lock it to the upper section, which is lowered and both lock together automatically. The complete bridge is then run forward, with the 22 metres projecting forward of the launch vehicle in a long cantilever. The bridge is lowered so the far end sits first on the ground, and then the vehicle end is lowered to the ground. The launching arm is then detached from the bridge, and the vehicle either retires to allow MBTs to cross or it can cross the bridge itself.
The bridge can be deployed by the two crew members without them having to leave the vehicle, although it is normal in peacetime training that the commander dismounts for safety reasons. The entire operation, from halting the bridgelayer at the gap to the first vehicle crossing takes about five minutes.
The brigelayer carries an MG3 Machine Gun which can be mounted on the commander's cupola, and twin clusters of Multi-Barrel Smoke Grenade Dischargers (MBSGDs) are mounted on the rear bridge supporting mast.
One bridgelayer is used by the School of Armour at Puckapunyal for training purposes, with two vehicles equipping the 1st Armoured Regiment at Palmerston in the Northern Territory. The five bridgelayers carry Australian Army registration numbers in the range 27788 to 27792 inclusive.
![]()
Six Leopard ARVMs were included in the initial purchase of tanks, and, as has been related in Part 1 of this series, were among the first vehicles to be delivered. A further two ARVMs were purchased later, bringing the total of ARVMs in Australian service to eight.
The ARVM is the only non - RAAC crewed vehicle of the Leopard AS1 family of vehicles. It is also virtually identical to vehicles used by Germany and other nations, in that no stowage bins replaced the hull - mounted pioneer and other tools in the vehicles bought by Australia. Used by the Royal Australian Electrical and Mechanical Engineers in support of Leopard equipped units, the ARVM has an outstanding reputation. It was the first of the modern style ARVs, employing an hydraulically operated crane and well as a forward mounted winch.
|
|
|
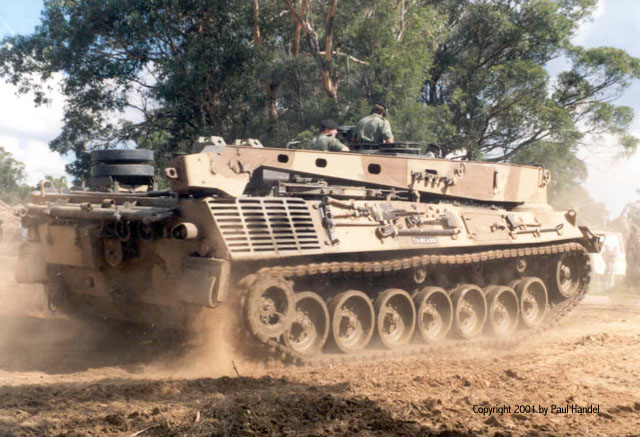
An ARVM moving cross country. This vehicle has been camouflaged with mud in different consistencies to give a two colour effect. (arvm02) |
The ARVM is an integral part of the Leopard family, as it is not only used for recovery purposes, but also used for the immediate servicing needs of the normal tank. Leopards were designed by the German Bundeswehr with National Servicemen in mind. This meant having easily accessible means of checking fluid levels in the powerpack, and enabling easy removal and replacement of the powerpack. In fact for many servicing tasks, the Leopard's powerpack is removed from the vehicle.
The ARVM uses the powerpack, drive train and suspension of the Leopard MBT, but a completely new hull. This hull has a raised casemate at the front, in which is mounted the winch and from where the crew operate the vehicle. On the right side of the vehicle is mounted an hydraulically operated crane, which can slew 270 degrees. A special frame can be mounted on the engine deck which allows carriage of a complete Leopard powerpack.
The recovery winch has a direct pull capacity of 35 tonnes, which can be increased by use of the single snatch block carried on the vehicle to 70 tonnes. The winch cable has a useable length of 90 metres. The winch rope is deployed from the vehicle via a small hatch in the front of the lower hull. The front mounted dozer blade steadies the vehicle during winching operations, or can be used for minor dozing work.
The crane jib, mounted on the right side, has a hoisting winch with a large multi-sheaved block which mounts a hook for lifting. The crane has a capacity of up to 20 tonnes, and is able to lift the complete Leopard powerpack and move with it slung from the crane, or it can lift the complete turret from an MBT, in which case the vehicle must deploy the spade for stabilisation, and it cannot move whilst lifting the turret.
The ARVM carries a range of hand tools and special tools to allow removal of a powerpack in the field. A vehicular towbar is carried across the rear of the hull, and unlike the other Leopards in Australian service, the pioneer tools are carried in brackets on the hull sides.
A bank of MBSGDs is located on the left side of the superstructure, and two MG3 Machine Guns can be mounted - one in a ball mount on the left front of the superstructure and the other on the commander's cupola. A crew of up to four can be carried.
One ARVM is located at Puckapunyal to support the School of Armour, whilst the 1st Armoured Regiment in Palmerston has four. At least one is held at Bandiana for the training of recovery mechanics, whilst the remainder are repair and pool stock. The original six ARVMs carry the Army Registraion Numbers 27782 to 27787 inclusive and the second batch carry the numbers 32932 and 32933.
![]()
 |
A bridgelayer of Armoured Centre in the first stage of the bridge launch sequence. The stabilising blade has been lowered to provide a firm support to the bridge when launching. (avlb02) |
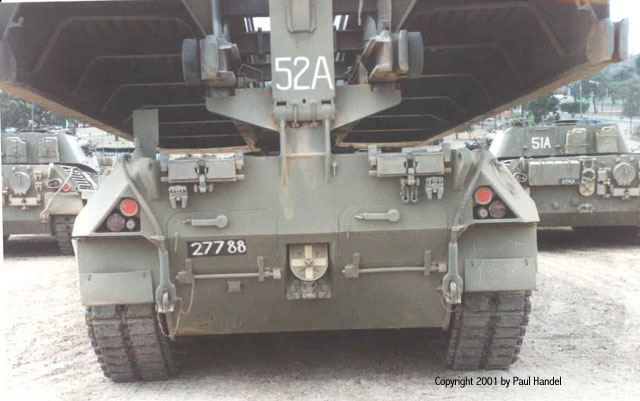 |
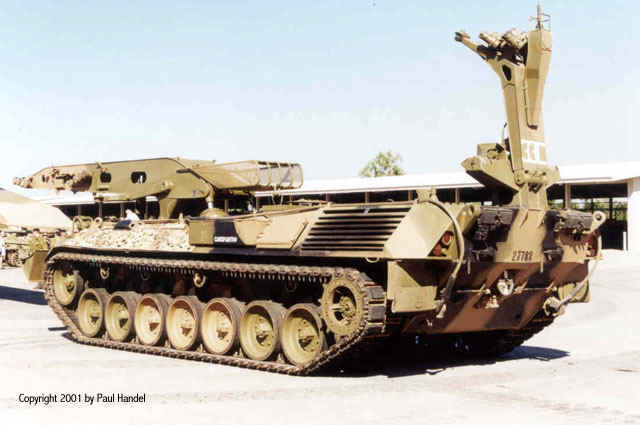
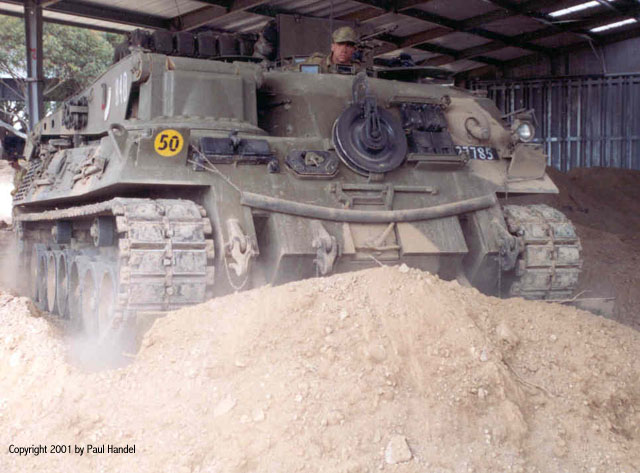
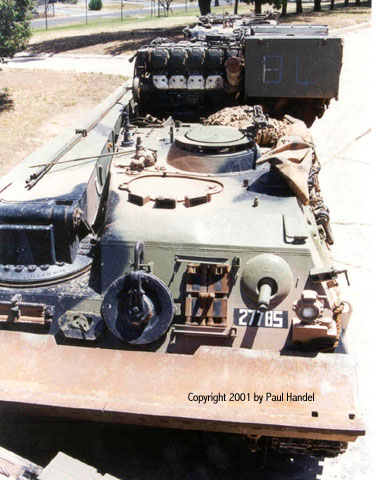
The bridgelayer from the rear showing the difference in hull shape to that of the MBT. Note the crude rendering of the registration number, with different sized numbers. The mast is in the upright position and some of the guide rollers can be seen. (avlb03) |
 |
The lower bridge section is run out of its parking position whilst the top half of the bridge is lifted to a horizontal position. (avlb04) |
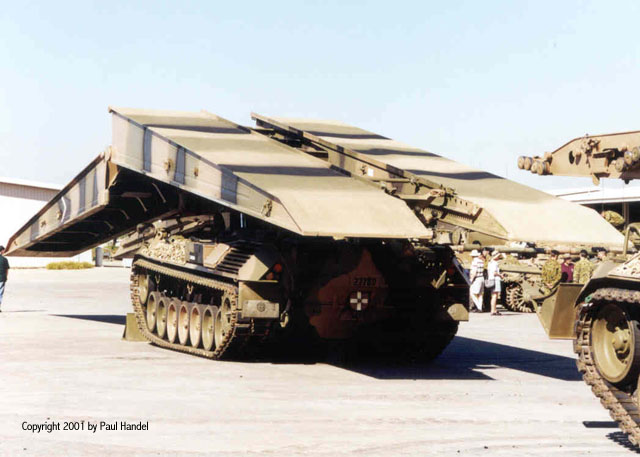 |
Both sections of the bridge are now tilted to allow the locking of the two sections together in order to make the bridge complete. This is a recent photo of a bridgelayer of the 1st Armoured Regiment and bears the current three colour Australian camouflage. (avlb05) |
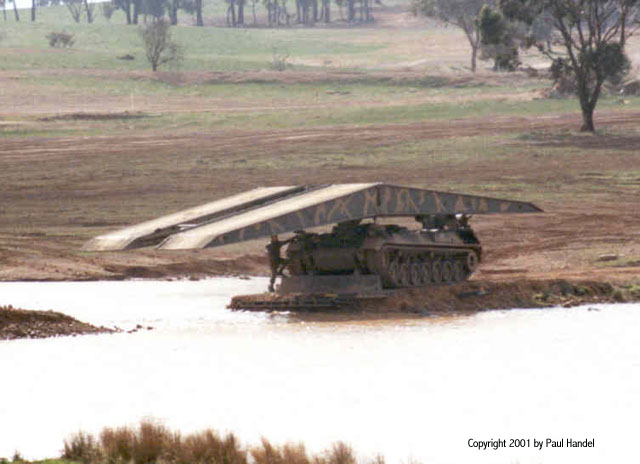 |
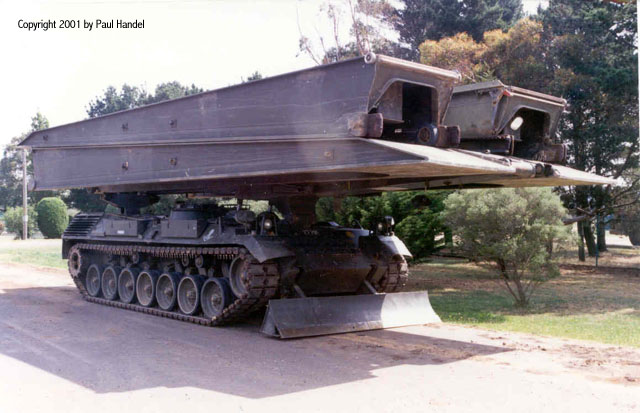
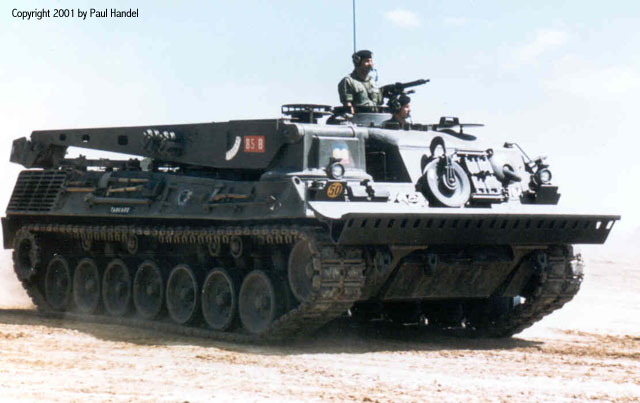
The bridge is now complete as one and is about to be launched across a water gap. Although the bridge can be launched without the crew being exposed to fire, peacetime operations require safety to be paramount and so the vehicle commander is dismounted. This photo shows the bridgelayer in German green with mud applied in patterns. (avlb06) |
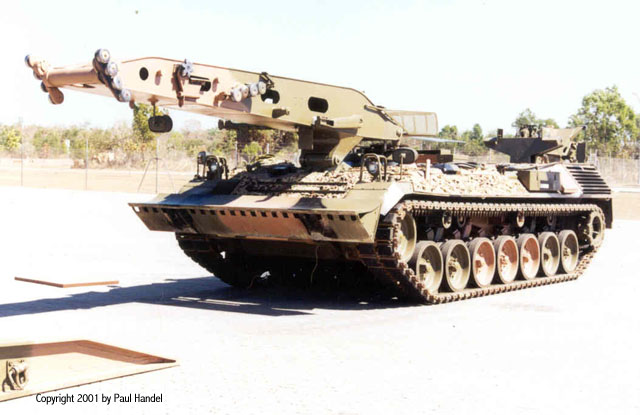
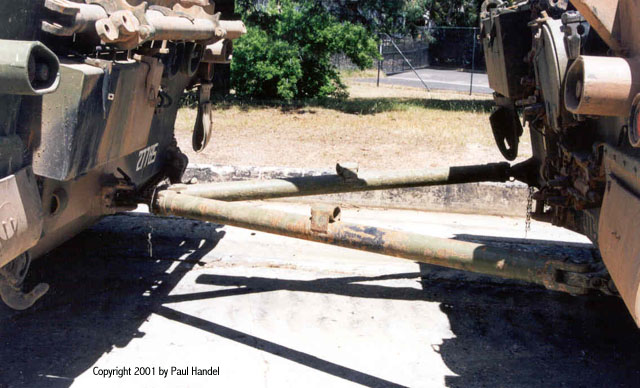
| The bridge fully extended from the launching arm, and about to be lowered to the ground. In this position the vehicle is counterbalancing a 22 metre 10 tonne load from its launching arm. (avlb07) | |
 |
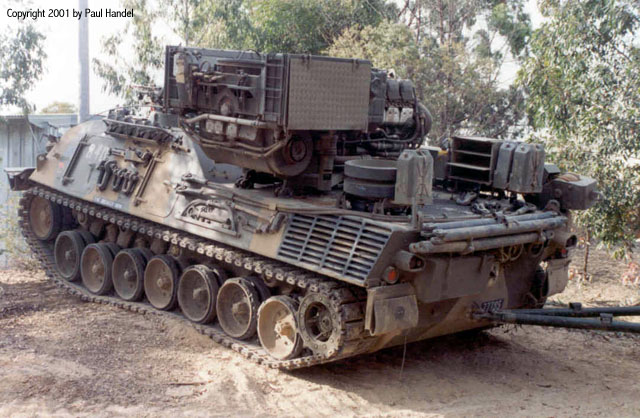
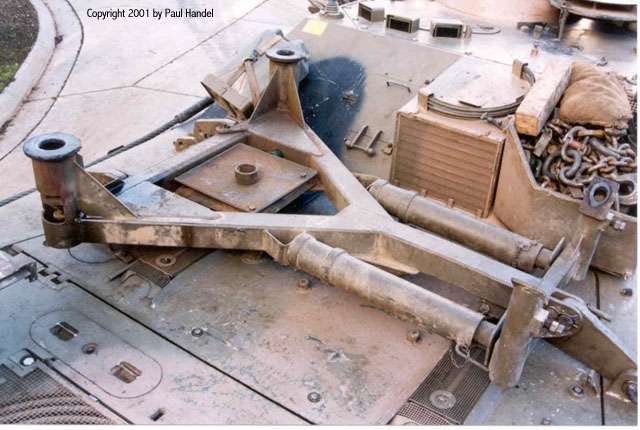
A 1st Armoured regiment bridgelayer without its bridge, showing the launching arm and guide rollers. The mast has been laid flat. This bridgelayer carries the Barracuda Mobile Camouflage System on the forward part of the hull. (avlb08) |
|
Rear view of the same vehicle with mast erected. The vehicle's radio callsign is painted in white of the mast. (avlb09) |
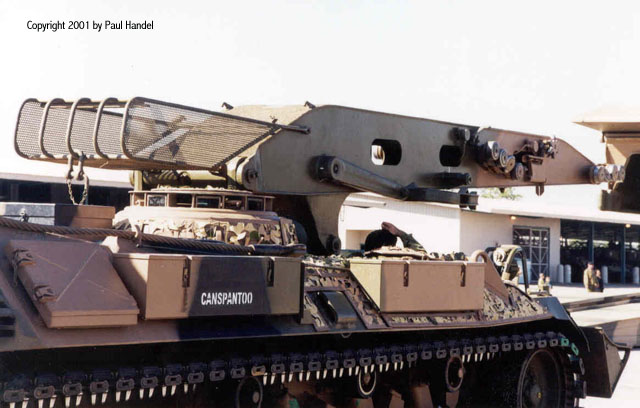 |
Detail view of the right side of the same vehicle, showing the hull stowage boxes, commander's cupola and the launching arm. (avlb10) |
 |
An ARVM of the 1st Armoured Regiment at speed. The crane is mounted on the right side of the vehicle and lies flat when in the stowed position. This vehicle carries a full complement of coloured signs, including the Regiment's black Leopard-head insignia. (arvm01) |
 |
Lifting the engine deck of an MBT prior to an engine lift, this ARVM has deployed its spade in order to stabilise the vehicle. A short "conning tower" is fitted to the commander's cupola, indicating recent fording operations. (arvm03) |
 |
An ARVM using its blade for earthmoving operations. The recesses in the hull for the blade support arms can be seen, as can the hatch covering the winch rope access port. (arvm04) |
 |
The same ARVM towing a tank. A spare power pack is mounted on the rear deck, and the heavy duty tow bars can be seen. Several 20 litre plastic water cans form part of the stowage. (arvm05) |
 |
A high angle front view of an ARVM, showing the driver's hatch and crew commander's cupola. A spare power pack is carried by this vehicle. (arvm06) |
 |
A close-up of the ARVM (on the left) with tow bar hooked up to an MBT. Stowage racks for tow bars can be seen on the hull rear above the tool box. (arvm07) |
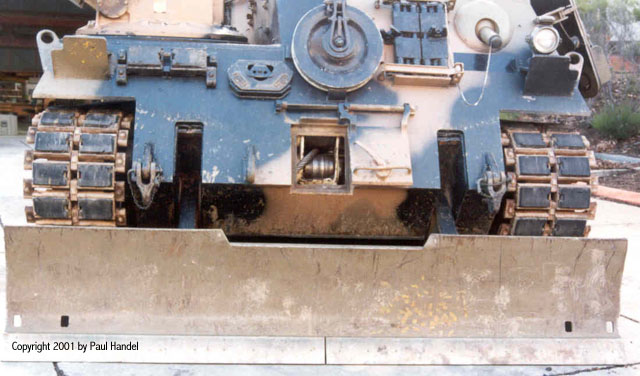 |
The hull front showing the dozer blade lowered and the cover for winch rope access open. It is a lift and slide hatch. Stowage for the snatch block and spare track links can be seen, as can the ball mounting for an MG3 machine gun. (arvm08) |
 |
Details of the frame which carries the power pack on the rear deck of an ARVM. Other stowage can be seen, as can the third crew hatch and vision blocks. (arvm09) |
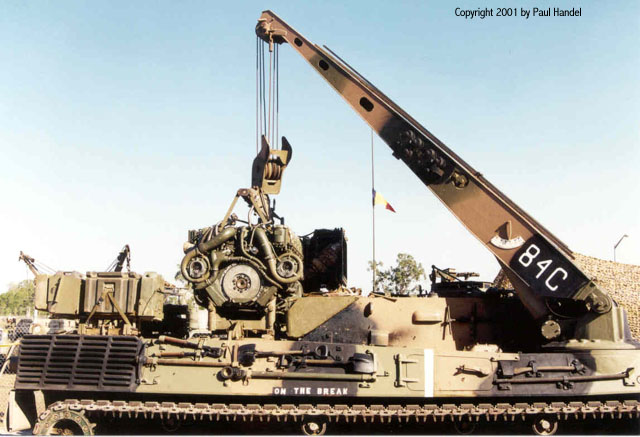 |
The crane with power pack slung is about to place the pack onto the frame. Note the multiple reeving of the crane hook and the jib anle indicator on the side of the jib. (arvm10) |
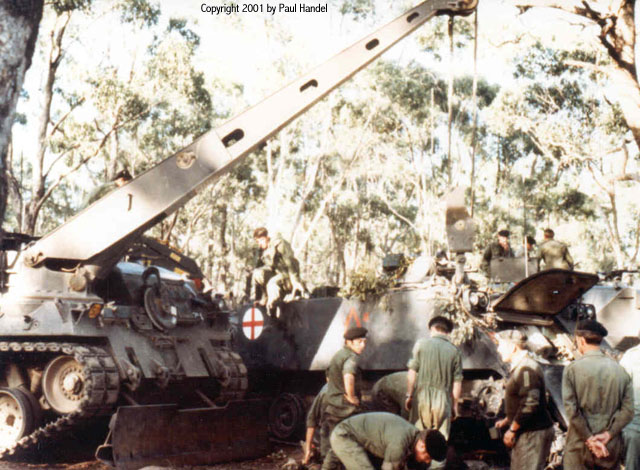 |
An ARVM assisting in changing a torsion bar on an M113A1 Ambulance. This procedure is made much easier by using the ARVM to lift the complete side of the M113 off the ground. (arvm11) |
![]()
Article Text and Photographs Copyright ©
2001 by Paul D.
Handel
Page Created 04 June, 2001
Last Updated 05 June, 2001
Back to Anzac Steel Main Page