![]()
Leopard AS1Part Four
|
|
|
|
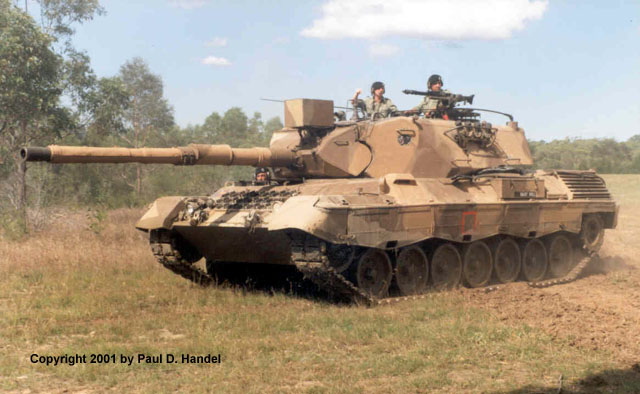
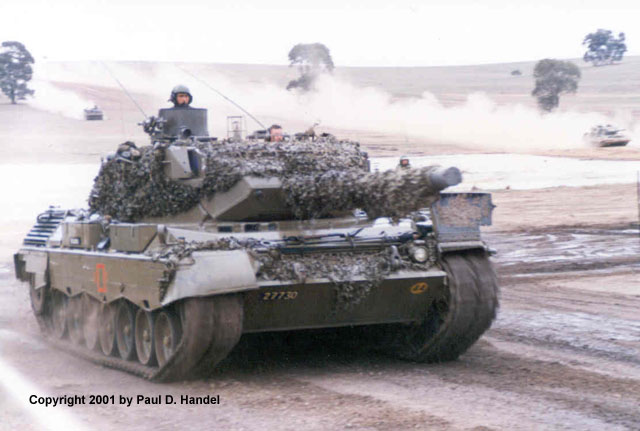
This Leopard AS1 is about to enter a treed area, and so the aerials have been tied forward across the turret roof to avoid damage. A mud camouflage has been applied to this B Squadron tank. The red square can be seen on the side skirt, and the black leopard decal is visible on the forward part of the turret side under the grab handle. |
![]()
This article concludes our look at the Australian Leopard Main Battle Tank (MBT)
family which is currently in use with the Australian Army. Over its twenty four
year service life with the Australian Army, the Leopard AS1 has undergone few
modifications, and the basic vehicle remains very similar to that which was
purchased in 1975.
|
|
|
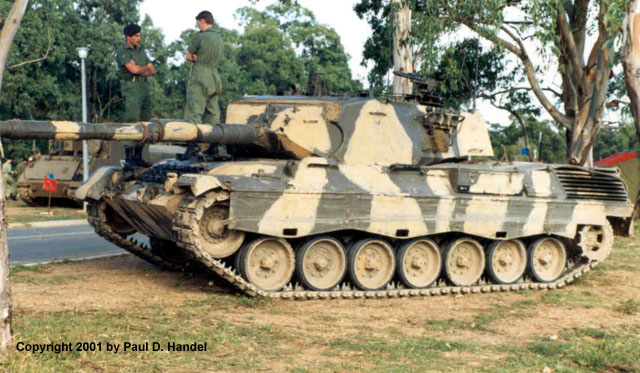
A colourful camouflage pattern using mud appears on this Leopard AS1 of A Squadron, 1st Armoured Regiment in 1981. The mud has been streaked over the base olive drab colour. A Troop pennant of a white skull and crossbones on a black background is flying from one of the tank’s aerials. |
This article covers some of the various colour schemes, permanent or otherwise,
crew modifications and different markings which may be of interest to the
modeller and researcher.
All photos except where noted, were taken by the author and are his copyright.
![]()
 |
LT COL Peter Jarratt, Tank Project Officer (left) and MAJ Harry Percival, DEME, in the turret of a German Leopard 1A3 or 1A4 which has been painted in the markings of one of the trials Leopard 1A2s. This was on the occasion of their visit to the Krauss Maffei factory complex in Munich, Germany, in 1975. The configuration of the open tool racks on the hull sides contrasts with the tool bins of the Leopard AS1. (Dept of Defence Photo) |
 |
Leopards awaiting issue at the Bandiana ordnance depot. The tanks are coloured in German army green, and carry no markings other than the Army Registration Number. Note the M113A1 vehicles, mounting T50 turrets, in the background and their contrasting colour. |
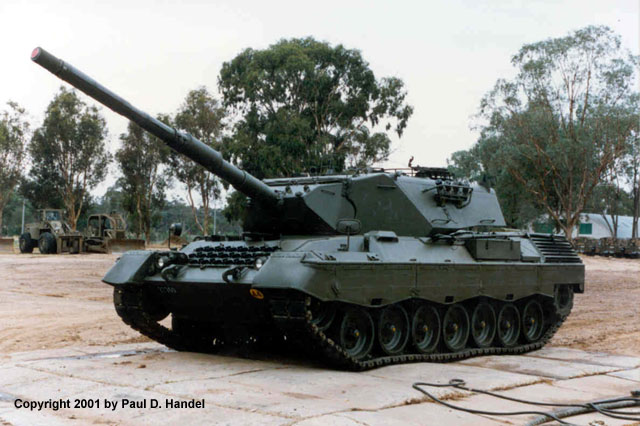 |
Another view of a Leopard AS1 awaiting issue. On this vehicle the bridge
classification sign, a yellow disc with 44 in black, is the only visible
marking. |
 |
A series of stripes, using local mud, has been added to this Leopard AS1 of 1st Armoured Regiment. The front portion of the side skirt has been removed, and the mudguard area shows sign of damage. The photo was taken in 1980. |
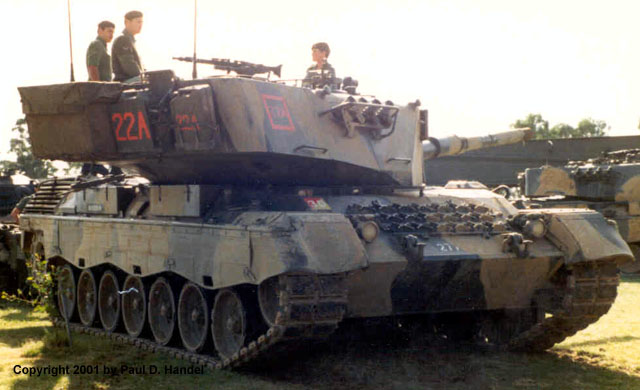 |
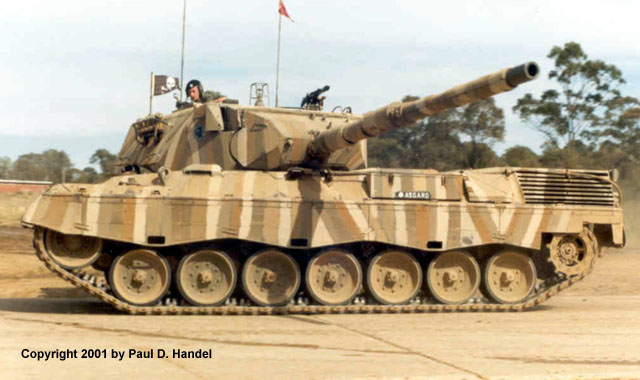
Another Leopard similarly camouflaged. The markings are visible in this view, with the B Squadron square and callsign 22A in red on the turret. The rear callsign is painted on a removable steel sheet, and is repeated on the jerrycan. An early type of local pattern stowage box is attached to the turret rear. |
 |
Showing evidence of a recent rain shower, a Leopard AS1 of C Squadron, 1st Armoured Regiment is parked on a road during a parade rehearsal. This tank is still painted in German Army green, and the front of the M113A1 vehicle behind shows the contrast with Australian olive drab paint. Two jerrycan holders are fitted to the rear of the turret, and the radio callsign is in white on a removable olive drab steel plate. A shipping marking can be seen on the hull side above the C Squadron red circle. |
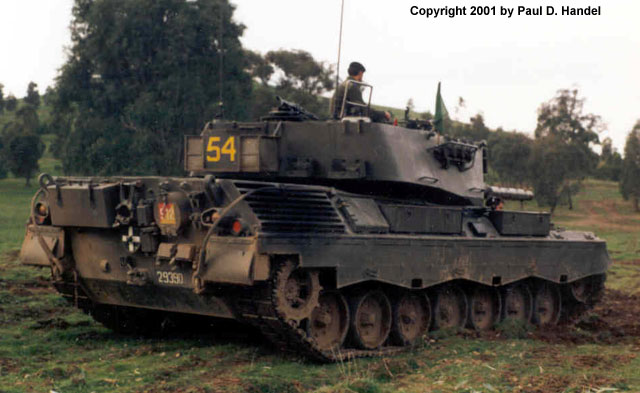 |
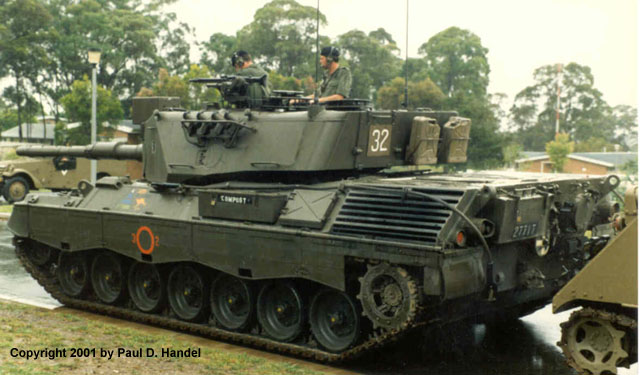
Manoeuvring at an ammunition point, a Leopard AS1 of the Armoured Centre (later School of Armour) carried the radio callsign 54 in yellow on the back of another style of turret stowage box. The unit sign, 912 in white an an RAAC flash appears on the telephone box on the hull rear, and the ARN 29390 indicates one of the last tanks to be delivered. |
 |
The 1st Armoured Regiment Commanding Officer’s tank “Hilda” in the compound. It carries a Centurion Tank IR turret basket, as well as boxes on the turret roof. Poles for the support of camouflage nets have been lashed to the smoke grenade discharger rails, and a crowbar and other tools are fixed to the grouser rack on the glacis plate. |
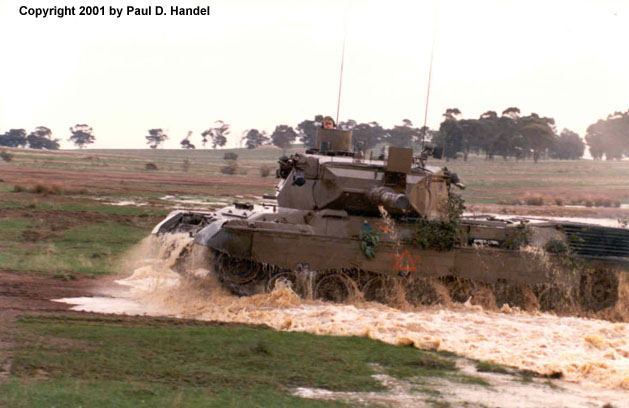 |
Emerging at sped from Loch Lee on the Puckapunyal range, this Leopard AS1 of A Squadron 1st Armoured Regiment has its turret traversed towards the camera. A short section of the snorkel tube is attached to the commander’s cupola to allow fording to take place. |
 |
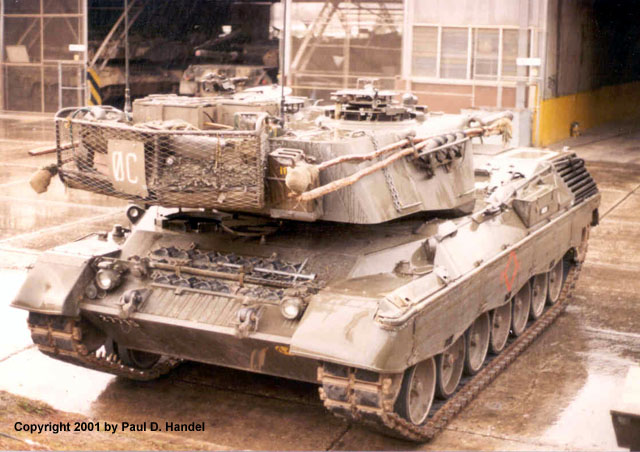
An OPFOR Leopard constructed by the soldiers of Tank Troop of the Armoured Centre. The thermal jacket and fume extraxtor have been removed from the barrel, and the barrel muzzle cover has been packed out to resemble a T54/T55 series 100mm gun. The searchlight has a round wooden disc attached to the front, and wire and canvas used to simulate the open turret hatches of a T54/T55. Track side skirts have been removed and the remaining mudguard sections painted white white parade stripes. A piece of unpainted wood is mounted on the glacis plate. The existing Australian markings are in poor condition. |
 |
A Leopard AS1 at speed after a river crossing. The short snorkel tube for the commander is seen, as is the camouflage net draped around the turret. The left front mudguard has been flipped up, and additional tools are attached to the grouser rack. |
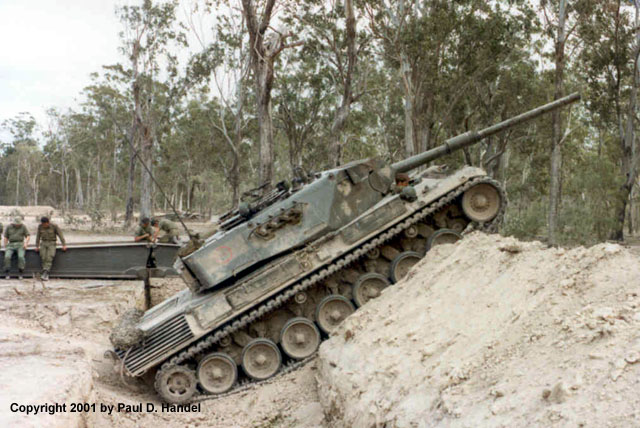 |
Stopped whilst trying to exit an anti-tank ditch, this Leopard AS1 of C Squadron 1st Armoured Regiment has no side skirt over the tracks. For a vehicle on exercise it is relatively “clean”, having no extra stowage boxes and just a rolled camouflage net on the rear of the engine deck. |
 |
A ‘mock-up” of a Leopard AS1. This exhibit was given to the RAAC Tank Museum in June 2001 and was constructed using the hull of a German Leopard 1 and a Canadian C1 Turret. The turret has had the left side aperture for the range finder plated over in order to resemble the AS1 turret. |
 |
A rear view of the mock-up showing the give-away sign of the hull’s origin – the exhaust louvres are of the early style. Hull stowage boxes from the standard Leopard AS1 have been added. |
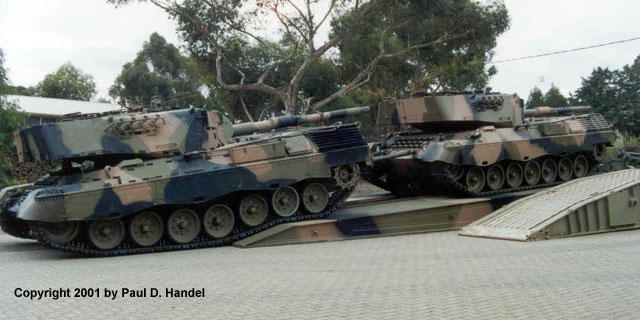 |
The mock-up being manoeuvred onto a Leopard Tank Bridge. The difference between the two types of exhaust louvres is demonstrated in this comparison view. |
![]()
Article Text and Photographs Copyright ©
2001 by Paul D.
Handel
Page Created 23 October, 2001
Last Updated 23 October, 2001
Back to Anzac Steel Main Page